I rarely {ok, NEVER} post anything on my domestic little blog that isn’t a recipe. But, when I did this little craft, I knew that I MUST share. …Once again, this idea is NOT my own, but I can’t remember where I found it. Regardless, the finished product is now one of my favorite things in my home…
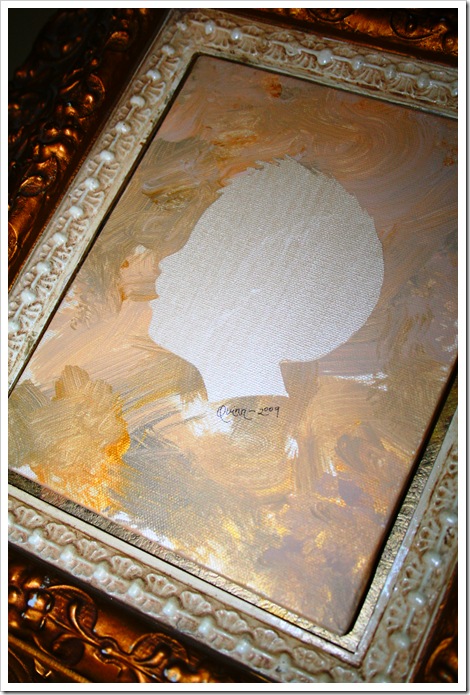 See….isn’t it beautiful! I can’t wait to make many more
in the future…
Here are the step by step instructions…
1. Take a picture of your child’s silhouette. It doesn’t have to be anything spectacular…print it out as a 5x7. (or desired size)  2. Take an 8x10 sized canvas and paint the entire thing. with metallic white paint. Allow to dry completely!
  3. Tape the silhouette picture of your child on top of the contact paper and carefully cut out silhouette with contact paper.
 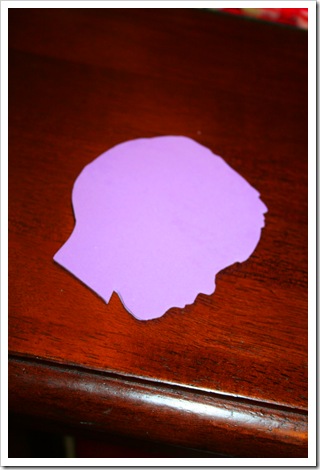 4. On dry canvas, adhere the contact paper silhouette to the center of the canvas. (Making sure all edges are stuck down)
  5. Have your child paint the canvas with desired colors. Make sure to cover all of the white. (Tip: You may want to start by painting around the edges of the silhouette to give it an extra bit of “glue!”)
 6. Let dry completely!
7. Carefully remove silhouette.
8. Make touch ups, if needed.
9. Take skinny sharpie to write child’s name and date under silhouette!
10.Hang on the wall and admire!
Here’s a picture of the one that Q made for Mammer & Slickpaw for Christmas. They LOVED it!  And, the one on my mantle I made a few months ago. Thiers is glued to a pre-printed canvas I found at Hobby Lobby. And, mine is glued on top of a really ugly print inside a vintage frame I found at a little shop in Abilene. Your possibilities are endless. And, I think it would make a beautiful wall collage if you have multiple kids! :)
  And, here’s one more fun idea…give this as a gift! All of the supplies are fairly inexpensive and the friend that I gave it to was the perfect recipient. She has three kids and I know she’ll enjoy making these sweet keepsakes!
  Happy creating!


Once dough is at the consistency you want, remove from heat.
Have fun!


