{This is just a little "spin off" of my PoeFam blog that is a home for my domestic attempts...recipes, house stuff and more! It's named after my mom's mom, Miriam Elizabeth Davis...better known as "Gackey!" She was a lovely lady and oh so domestic. So, follow me as I try to fill her shoes...or, better yet, wear her apron!}

Wednesday, February 17, 2010

A Keeper

While we had company over a few weeks ago, I stepped out on a limb and made a new Southern Living dessert recipe! And, I was SO glad that it was a keeper! Everyone raved...and, I'll make it again, FOR SURE! Enjoy!
Banana Bread Cobbler

1 cup self-rising flour
1 cup sugar
1 cup milk
1/2 cup butter, melted
4 medium-size ripe bananas, sliced
Streusel Topping
Vanilla ice cream

Preheat oven to 375°. Whisk together flour and next 2 ingredients just until blended; whisk in melted butter. Pour batter into a lightly greased 11- x 7-inch baking dish. Top with banana slices, and sprinkle with Streusel Topping. Bake at 375° for 40 to 45 minutes or until golden brown and bubbly. Serve with ice cream.

Streusel Topping
3/4 cup firmly packed light brown sugar
1/2 cup self-rising flour
1/2 cup butter, softened
1 cup uncooked regular oats
1/2 cup chopped pecans

Stir together brown sugar, flour, and butter until crumbly, using a fork. Stir in oats and pecans.

Monday, February 15, 2010

Dressing...with a KICK...

We recently went to some new church friend's house for dinner. Not only did we fall in love with their family, but we fell IN LOVE with their homemade dressing recipe! I seriously COULD NOT stop thinking about it after that evening. And, sweet Irline even made me some and brought it to church! :) Since it's something that she just makes according to her taste, she doesn't have a recipe, but she gave me a pretty good idea of how to make it. I haven't done it on my own yet...but I can't wait to try!

Here are the ingredients:
buttermilk ranch
fresh cilantro
jalapeno
honey
lime

And, she said...
Try 1 cup ranch, 1 cup of cilantro leaves (do not include the stem), half of jalapeno with some seeds (it's the seeds that gives the spice so it's up to you how spicy you want it) and about 2 tbs of honey. I use a magic bullet to blend all together. You can use a food processor, however a blender may be too big. And don't forget the lime!

And, even though I think it would be good on ANYTHING (especially a great chicken nugget dip), she served it over salad with cheese, tomato, beans and corn! It was GOOOOOODDD!

Tuesday, February 2, 2010

Chick-fil-a-ish!

I Week, SOS and more 035 

I recently used this recipe and made little chicken nuggets instead of strips! I took it to our church’s Mom’s group, served with BBQ sauce, and EVERY SINGLE ONE of them was gone by the end! I must admit that I think I liked them better as little nuggets! … Thanks again, Meredith, for this great recipe!

I will NEVER make my kid’s birthday cakes!!!

I AM NOT…I REPEAT…AM NOT a cake decorator/baker/or anything of the like! It is SO hard to me. My cakes always stick, the icing is always too thick or too runny, and the finished product always looks like poo! Thankfully, they still taste good…and, if I’m making a cake, I know that the fact that I made it will overshadow how ugly it is.

So, for Mammer’s birthday, I made another attempt at a cake…and FAILED miserably! But, at least the strawberries were huge and pretty…and it tasted YUMMMMMMYYYY!!! And, if you’re aware of my preggo love for Strawberry Soda, you know that this was right up my alley! I Week, SOS and more 003Lowe's with M&S, 16 week belly, Mammers bday 059Strawberry Soda Cake
1 - package Strawberry Cake mix (any brand)
1 1/3 cups Strawberry Soda
(strawberry soda is substituted for the amount of water on the cake mix)
2 - 3 Eggs (if you want it lighter and fluffier use three eggs)
1/3 cup vegetable oil
1 – 2 lbs Fresh Strawberries (Sliced)

Add cake mix to a large mixing bowl. Add egg, oil and strawberry soda. Beat until smooth. Pour into two round cake pans that have been greased and floured. Bake as directed on cake mix or until toothpick inserted comes out clean. When cake is done remove from oven and cool in pans for 15 minutes. Then remove to a wire rack and completely cool. Frost first layer with icing and arrange sliced strawberries on top. Add the second cake layer and frost top and sides with more icing and top with more sliced strawberries. Save one whole strawberry for the middle of the cake. Gently slice and fan the whole strawberry, Place on top in the middle of the cake.

Measurements vary depending on what brand of cake mix you use. Follow the directions on the back of the box substituting strawberry soda for the amount of water listed. Also add the amount of eggs and oil stated on the mix, I use Duncan Hines.


***For my icing, I made a typical cream cheese kind. Cream Cheese, Powdered Sugar and Vanilla!

Ole!

Here's another goodie that I got from a freind's recipe blog! And, after a F.I.T. from the little man because he didn't want to try it, he gave it a taste and then said, "I think I'm gunna need to use my fork!" In other words, he liked it! Little stinker! We'll make this again, for sure!
The Carrol Family's Fiesta Chicken
2-3 boneless skinless chicken breats, uncooked
1 can of Fiesta Corn
1 –1 1/2 cup{s} Salsa
Shredded Cheese

Preheat oven to 400. Tear pieces of foil for each piece of chicken. Place chicken breast in the center of the foil. Evenly divide the salsa and pour on top of the chicken. Divide the can of fiesta corn and pour on top of salsa/. Fold the foil over the top and close the edges tightly! Place foil packets on cookie sheet.

Bake at 400 degrees for 30+ minutes and remove. (Make sure your chicken is done...bake more if needed)

Open packets and top with shredded cheese. Place back in the oven for 2 mintues with foil packets open so the cheese can melt.

Serve over white rice and top with sour cream!

Monday, January 25, 2010

A twist on Banana Bread

When the bananas were starting to turn this time around, I went to cooks.com and found an easy banana bread recipe that did not disappoint. I thought it was fun that it was for bars...and even though I didn't have a jelly roll pan, I followed those instructions. It wasn't super sweet, but made a great, quick breakfast for a few days.


EASY BANANA BARS

3 lg. over ripe bananas (or 4 small)
3/4 c. sugar
2 eggs
1/2 c. nuts
2 c. flour
1/2 teaspoon salt, optional
1 teaspoon baking soda
Mix all ingredients. Put in 5 x 9 inch loaf pan that has been greased with shortening.
Bake at 325°F degrees for 1 hour OR

BANANA BARS: Pour mixture into jelly roll pan, bake until toothpick comes out clean (sides will pull away from pan). Make a sugar (confectioners') and water mixture and drizzle over the top when cooled. Cut into squares.
***
Do you have a favorite banana bread recipe? If so, please share! I'd love to try more! :)

Tuesday, January 19, 2010

A Priceless Keepsake: Craft “Recipe”

I rarely {ok, NEVER} post anything on my domestic little blog that isn’t a recipe. But, when I did this little craft, I knew that I MUST share. …Once again, this idea is NOT my own, but I can’t remember where I found it. Regardless, the finished product is now one of my favorite things in my home…more U & mantle 007more U & mantle 009   See….isn’t it beautiful! I can’t wait to make many more
in the future…

Here are the step by step instructions…

1. Take a picture of your child’s silhouette. It doesn’t have to be anything spectacular…print it out as a 5x7. (or desired size) Dishwasher, Q and Sillouette 004 2. Take an 8x10 sized canvas and paint the entire thing. with metallic white paint. Allow to dry completely! Christmas 2009 0043. Tape the silhouette picture of your child on top of the contact paper and carefully cut out silhouette with contact paper. Christmas 2009 003 4. On dry canvas, adhere the contact paper silhouette to the center of the canvas. (Making sure all edges are stuck down) Christmas 2009 006 5. Have your child paint the canvas with desired colors. Make sure to cover all of the white. (Tip: You may want to start by painting around the edges of the silhouette to give it an extra bit of “glue!”)Christmas 2009 0076. Let dry completely!

7. Carefully remove silhouette.

8. Make touch ups, if needed.

9. Take skinny sharpie to write child’s name and date under silhouette!

10.Hang on the wall and admire!

Here’s a picture of the one that Q made for Mammer & Slickpaw for Christmas. They LOVED it! Christmas 2009 148And, the one on my mantle I made a few months ago. Thiers is glued to a pre-printed canvas I found at Hobby Lobby. And, mine is glued on top of a really ugly print inside a vintage frame I found at a little shop in Abilene. Your possibilities are endless. And, I think it would make a beautiful wall collage if you have multiple kids! :) more U & mantle 008And, here’s one more fun idea…give this as a gift! All of the supplies are fairly inexpensive and the friend that I gave it to was the perfect recipient. She has three kids and I know she’ll enjoy making these sweet keepsakes! beginning of Jan 030 Happy creating!

Monday, January 11, 2010

Mexican Pot Pie

I recently clipped this recipe out of a magazine and am SO glad I did. It was EASY and was a hit. While we were eating it, Matt said, "so is this like a Mexican Pot Pie?" And, I thought it was the perfect description. Yum...and good leftover too! :) ...The only thing is that I think I could have sealed my crust better. It all kind of came out the sides... Fiesta Chicken Casserole
{I halved this recipe and made it in a much smaller dish...and, it only took one pie crust to lay over the top!}
1 package (15 ounces) refrigerated pie crust (2 crusts)
1 jar (16 ounces) Chunky Salsa
1 can (10 3/4 ounces) Cream of Chicken Soup
1 cup sour cream
8 ounces shredded Cheddar cheese (about 2 cups)
1 package (24 ounces) frozen whole kernel corn
2 cans (9.75 ounces each) White Chunk Chicken Breast in Water, drained
1 can (about 15 ounces) black beans, rinsed and drained

Let the pie crusts stand at room temperature for 15 minutes or until they're easy to handle.
Stir the salsa, soup, sour cream, cheese, corn, chicken and beans in a large bowl. Spoon the chicken mixture into a 13 x 9 x 2-inch baking dish.

Unfold the pie crusts on a lightly floured surface. Lay the crusts side-by-side so that they overlap by about 3 inches in the center. Press the seam to seal. Roll the pie crust into a 14 x 10-inch rectangle. Place the pie crust over the chicken mixture. Trim the excess crust from the edge. Cut several slits in the crust.

Bake at 400°F. for 40 minutes or until the crust is golden brown.

Yucky Ingredient...Yummy Appetizer

I recently found this fun recipe from my friend Cara's blog. And, these babies were a hit when I made them for a bunch of people that came over for the Texas game. I must admit, the miracle whip made me nervous, but even I loved them...and I HATE miracle whip!
Toasted Cheese Confetti Crackers
1 Family Size box of Triscuits
1 cup shredded mozzerella cheese
1/2 cup Miracle Whip Dressing or Real Mayonnaise
1/2 cup green onions, finely chopped
3 tbsp. chopped red pepper

Mix all ingredients together EXCEPT for Triscuits. Take a teaspoon of the mixture and place on top of the Triscuits. Place the topped Triscuits into the oven & broil for 2-3 minutes, or until bubbly. Watch carefully as they cook so they don't burn.

Friday, January 8, 2010

A Tangy Secret Salsa

I've never tried making my own salsa. It always seemed like too much trouble, But, when I saw this recipe in my new Southern Living, I had to try it...and, it is GOOD! My husband, the picky salsa eater extraordinaire, even approves. He's actually requested that I make it again...for all of his football watching friends the other night! ... And, I took that as a serious compliment! :) You should try it!!! ...If the picked okra turns you off, don't let it! It just gives it a little extra something...it's YUM!
Pickled Okra Salsa
5 whole pickled okra sliced
1/2 cup chopped sweet onion
4 tsp chopped fresh cilantro
1 tsp fresh lime juice
1/4 tsp salt
1/8 tsp freshly ground pepper
1 (14.5 oz can) diced tomatoes with mild green chilies, drained

Pulse first six ingredients and half of the tomatoes in a food processor 4 to 6 times or until thoroughly combined. {Stir in remaining diced tomatoes....or, pulse them all if you want a less chunky salsa!} Serve immediately or cover and chill. Store in refrigerator up to seven days. If refrigerated, let stand at room temperature for 15 minutes before serving.

Mimi's Specialty

These pictures got lost in the shuffle and I never posted one of my VERY favorite recipes. ...I'll never forget my first Poe Thanksgiving when I tried these for the first time!!! Mimi's Apricot Bars are always the most coveted item on the Thanksgiving menu. I seriously can't imagine Thanksgiving without them and Mimi always makes a TON to appease all of her fans. ...It's a tradition that will continue for always and a recipe that will ALWAYS make my mouth water!


Mimi's Famous Apricot Bars

1 box of graham crackers
(1 cup of graham crackers, finely crushed)
3/4 cup butter or margarine
1 cup sugar
1/2 cup milk
1 egg, slightly beaten
1 cup flaked coconut
1 cup pecans, finely chopped
3/4 cup dried apricots, finely chopped
1/2 teaspoon vanilla


Line a 13 1/2 by 8 1/2 pan with 15 squares of graham crackers. Melt butter in a saucepan. Stir in sugar, milk and egg. Cook, stirring frequently, until mixture is slightly thickened. (about 5 minutes.) Stir in graham cracker crumbs, coconut, pecans, apricots and vanilla. Spread over crackers in pan. Top with another layer of crackers. Glaze with powdered sugar glaze and let stand until glaze hardens. Cut into bars.
***
Apricot Bar Glaze

2 cups powered sugar, sifted
2 lemons, juiced
2 tablespoons butter, melted

Blend all together thoroughly.


Childhood Memories

Chow-Chow was something that I can vividly remember having as a kid. Matt had never heard of it...as like most people, I'm sure. But, it's good...kind of "pickly"...a relish with a bit of a kick. And, the time I remember it the most was when we ate our Black-Eyed Peas & cornbread on New Year's Day. So, this year, I tweaked an old favorite recipe by adding black-eyed peas and topping it with chow-chow. YUMMMMMYYYY! Matt didn't like the Chow-Chow, but Quinn did...and, he ate his entire helping of sausage and black-eyed peas! I was impressed.
New Year's Day Edition of Beans & Rice with Sausage
***
1 package of Beef Smoked Sausage
1 can of red beans
Nature's Seasoning
white rice
salt
pepper
Chow-Chow
***
Grill smoked sausage. (I use my trusty George Forman.) Cook rice. Heat beans with Nature's Seasoning. Cook rice and serve it topped with beans and cut up sausage. Top with Chow-Chow. Salt and Pepper to taste!

Friday, January 1, 2010

Christmas Dinner Favorite

Christmas 2009 163  Our Christmas Day menu was nothing fancy this year…definitely not gourmet. But, it was traditional and GOOD! It contained many of our favorites and made for great leftovers the day after.

Christmas Day Menu
Ham
Lemon Pepper Roasted Chicken
Broccoli & Cheese Rice
Mashed Potatoes 
Fruit Salad
Creamed Corn
Crescent Rolls
Christmas 2009 162 
By far my favorite part for as long as I can remember has been the Broccoli & Cheese Rice. I could eat it and nothing else! SO YUM! So, I thought I’d share….it’s a great addition to that traditional meal…

Broccoli & Cheese Rice

2 lbs. Frozen Broccoli (cooked)
1 cup of white rice (cooked)
1 cup of milk
Cream of Mushroom
Cream of Broccoli
Velveeta
Salt & Pepper

Cook broccoli and drain. Cook rice. Combine broccoli and rice in large pot and add soup, milk and Velveeta. Cover and simmer on low for 15-20 minutes. Check often to make sure it isn’t sticking. Add salt & pepper as desired.

Santa's Fancy Cookies

This year, I decided to try a new recipe for Santa that I found in my Southern Living. And, I LOVED them!!! Apparently, Santa liked Chocolate Chip better, but I might disagree! :)
Chai Tea Eggnog Cookies

Makes: 2 dozen ---Hands on Time: 20 minutes


1 chai tea bag
1 (17.5-oz.) package sugar cookie mix
1/2 cup melted butter
1 large egg
4 tablespoons eggnog, divided
Parchment paper
Cinnamon sugar
1 cup powdered sugar
1/2 teaspoon nutmeg

1. Preheat oven to 350°. Remove tea leaves from tea bag; discard bag.

2. Stir together tea leaves, cookie mix, butter, egg, and 2 Tbsp. eggnog until well blended.

3. Drop dough by tablespoonfuls onto parchment paper-lined baking sheets. Flatten dough slightly with bottom of a glass dipped in cinnamon sugar.

4. Bake at 350° for 8 to 10 minutes or until lightly browned. Remove from baking sheet to a wire rack, and cool completely (about 10 minutes).

5. Whisk together powdered sugar, nutmeg, and remaining 2 Tbsp. eggnog until smooth. Spoon over cooled cookies.

Tuesday, December 29, 2009

Comfort Food

This recipe was made for me by my friend, Remy. After we had it for the first time, I quickly acquired the recipe for myself and it is one of our faves. We even had it for Christmas Eve dinner this year! And, it was a HIT! Hope you enjoy!Chicken & Dumplings
Rotisserie Chicken
2-3 cans of buttermilk biscuits
4-6 cups of chicken broth
1 can cream of chicken
1 tsp. Nature's Seasoning (or Poultry Seasoning)
1-2 chicken bullion cubes

Pour broth in large pot. Shred chicken into broth. Add extra bullion cube(s). Add seasoning. Bring to boil. Tear biscuits into small pieces and add. Boil 15-20 minutes. Add cream of chicken. Cook on low for 20 minutes. Salt & Pepper to taste.

Monday, December 7, 2009

Not without Mammer!!!

This past weekend, our house was the last stop for our Life Group Progressive Dinner. And, as usual, I underestimated how much work it is to host something at your home! ... Thankfully, Mammer came to the rescue and helped bake, clean and play with a very busy 2 1/2 year old! :) There is NO WAY that I could have done it without her!!!...And, the menu for the desserts included a few old faves and a few new guys!!!...

We had my Gackey's {famous} brownies...
Jeff Davis Pie...
And, the oh so easy, and oh so yummy, Symphony Brownies...

Then, I decided to make my ALL TIME favorite pie. In my cook book that my mom gave me when I got married, it is titled, "Brittney's Favorite Pie!" I don't know why I haven't made it in so long! It is ridiculously good!!!...
Cherry Cream Cheese Pie
1-15 oz can of Eagle Brand Milk
1- 8oz. pkg. Cream Cheese
1 tsp. Vanilla
1/3 cup Lemon Juice
1 can of Cherry Pie Filling
1 Graham Cracker Crust
Soften cream cheese and beat until fluffy. Add milk slowly while beating. Add lemon juice and vanilla and beat. Pour filling into crust. Chill several hours and allow guests to top with cherries if desired.
Then, the cutest little addition to the menu were these Key Lime Cupcakes. I loved how they turned out and they got rave reviews. (Especially from my little man!)
Key Lime Cupcakes
Batter:
1 white cake mix
1 cup less 1 teaspoon water
1/3 cup oil
3 egg whites
1 teaspoon freshly squeezed lime juice
2 teaspoons lime zest
¾ teaspoon green food coloring

Preheat oven to 350 degrees. Mix all ingredients in a bowl with an electric mixer. Beat on medium speed for 2 minutes. Pour batter into 24 lined cupcake tins and bake for 19-23 minutes. Let cupcakes cool completely and frost with key lime frosting.

Frosting:
1 package of cream cheese, softened
1/2 stick of butter, softened
2-3 cups powdered sugar
2 tablespoon lime zest
Lime Juice (to taste)
1 teaspoon vanilla
Cornstarch (if needed)

Combine butter and cream cheese in a bowl and beat until smooth, add zest and vanilla. Slowly add sugar until all is incorporated. (I added cornstarch to thicken) Frost cupcakes and garnish with a lime wedge if desired.

Monday, November 30, 2009

A Little Misleading...{but, worth it!}...

When I saw this recipe in my Kraft magazine, I have to admit that my preggo self was pretty excited! It looked so yummy to me! So, when we had friends coming over, I felt ambitious enough to make it. But, the recipe was a LITTLE misleading. It said that it was 30 minutes prep time...BUT...that included cooked chicken and cooked manicotti shells. (which added an extra 30 minutes, at least!) Even though the whole process took longer than expected, it was SO yum, and was even yummier the next day as lunch AND dinner!!! MMMMM MMMMMM!

Chicken & Spinach Manicotti
1-1/2 cups finely chopped cooked chicken breasts
1 pkg. (10 oz.) frozen chopped spinach, thawed, well drained
1 container (16 oz.) Cottage Cheese
2 egg whites
1 cup Shredded Mozzarella Cheese, divided
10 manicotti shells, cooked, drained
1-1/2 cups spaghetti sauce
1/4 cup chopped fresh basil (I used dried)

HEAT oven to 350°F.
COMBINE chicken and garlic in large bowl. Add spinach, cottage cheese, egg whites and 1/4 cup mozzarella; spoon into manicotti shells.
PLACE in 13x9-inch baking dish sprayed with cooking spray. Cover with spaghetti sauce.
BAKE 25 to 30 min. or until heated through. Top with remaining mozzarella; bake 5 min. or until melted. Sprinkle with basil.

Bring on the COLD!...

...because I LOVE cold weather food. This potato soup, courtesy of my friend Shannon, is a fave to make this time of year. Hope you enjoy!

Potato Soup

2 stalks of celery, thinly sliced
3 Tbsp. butter
1- 14 oz. can chicken broth
3 Tbsp. flour
1/2 to full bag of diced potatoes with onion
1 1/2 cups milk
4 slices of bacon, cooked and crumbled
shredded cheese, optional
extra milk and salt & pepper when needed

Cook chopped celery in hot butter over medium heat for about 5 minutes until tender. Stir in flour until combined. (forms a roux) Stir in broth, bring to boiling, stirring constantly. Add potatoes. Return to boil. Reduce heat, simmer uncovered 15 minutes. Mash potatoes, stir in milk and bacon- heat. Thin with milk if necessary. Add salt and pepper to taste. Top with cheese.

Monday, November 16, 2009

If you like pumpkin pie...

...then this will be right up your alley! It's a great "take to Thanksgiving" little treat! And, it is great with gingersnaps, graham crackers, or on your breakfast bagel! We love it around here! :) Pumpkin Fluff

1 can of pumpkin pie filling
1 small container of cool whip
Pumpkin Pie Spice

Mix filling and cool whip. Add spice to taste. Enjoy! Seriously easy!!!

Oh, Dishwasher...I miss you!!!

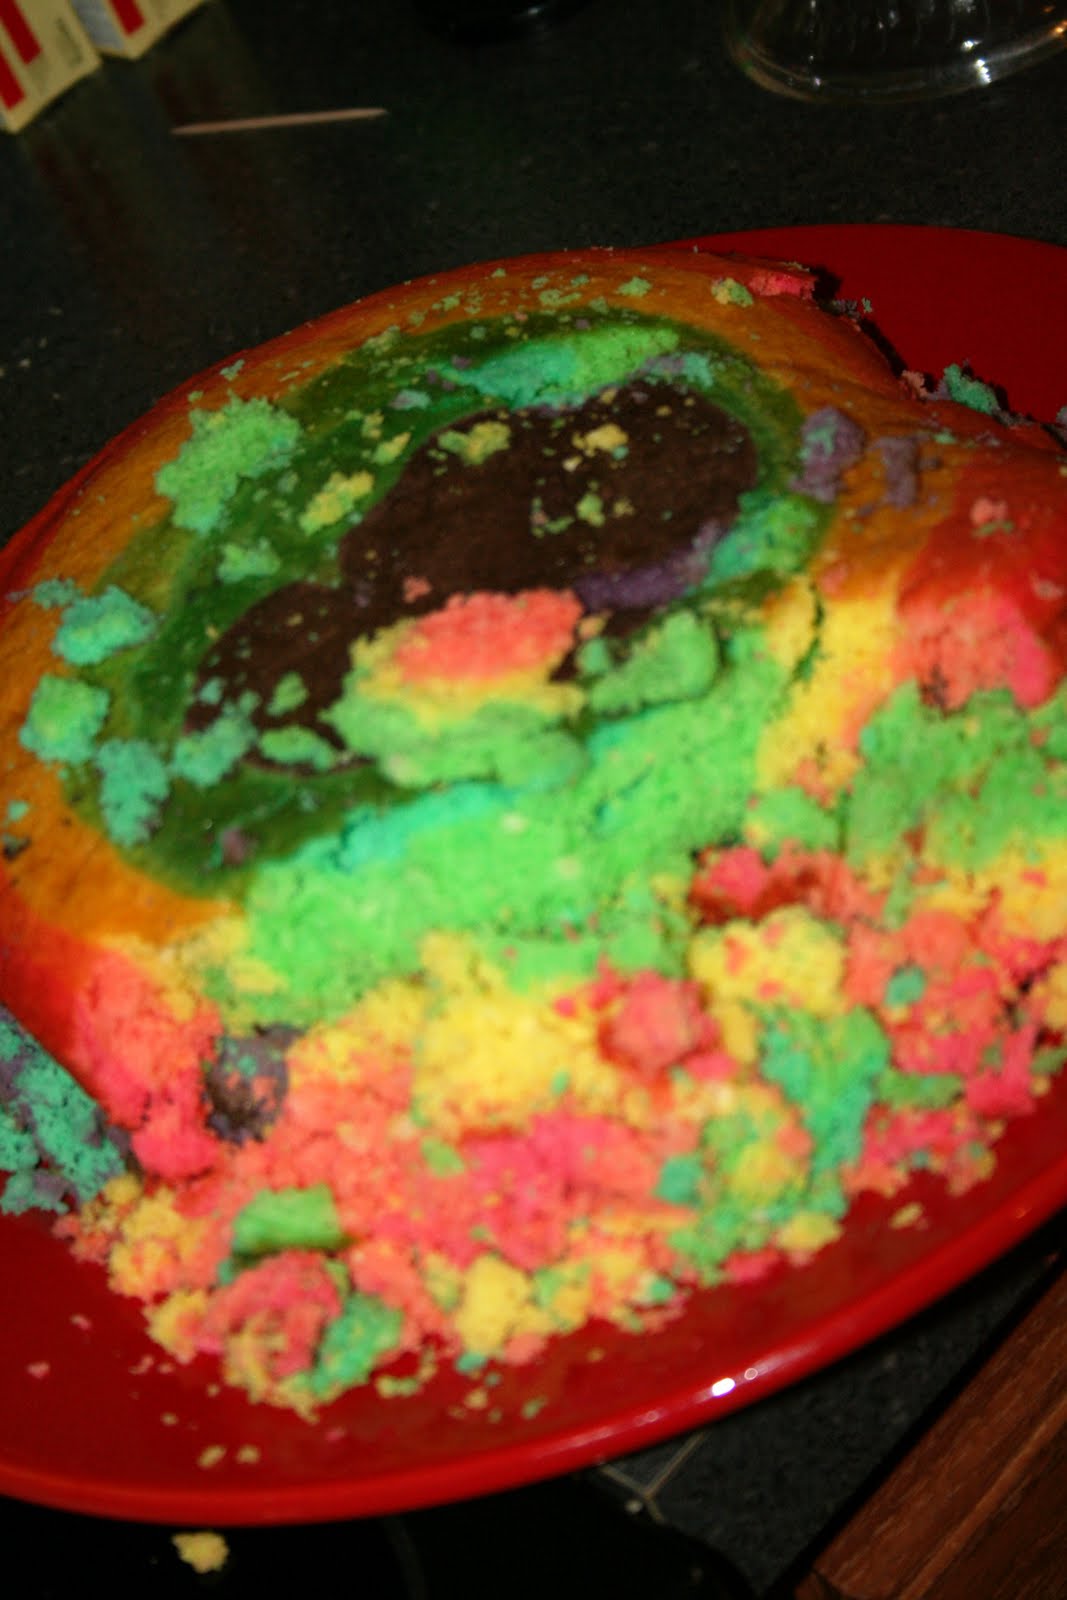
Almost 2 months ago, our dishwasher broke...and we just haven't made it a priority to get it fixed. But, after a failed attempt to make this cake for Alli's shower...and then doing it all over again for cupcakes, I was about ready to call the repair man! :) ...Needless to say, this recipe calls for LOTS of dirty dishes. But, it's worth it in the end. For whatever reason, my cake stuck horribly...but the cupcakes were perfect, yummy and a HUGE hit! ... Check out this blog for beautiful step by step pictures! .... Before baking, this is what it looked like...
And, after! SAD! Maybe i just needed to cook it longer!?!?....
Rainbow Cake (or cupcakes)
2 boxes white cake mix
24 oz of clear diet soda (I used ginger ale)
gel food colouring
16 oz whipped topping
2 oz instant fat-free sugar-free pudding mix (2 smallish boxes)
cream cheese
1/2 stick margarine
Powdered Sugar (if needed)
***
Mix the cake mix with the soda according to regular instructions on box. It will be lumpy afterward. (Use NOTHING else...just cake mix and soda) Measure the total volume then divide by 6 and measure into separate bowls. Stir color into each bowl with its own spoon. Layer the colors into your pan as you choose. (see pictures)
***
Bake the cake for however long the box tells you to bake it. Check it when the box says to, but usually it’ll need an extra 5 or 10 minutes or maybe more because of the density of the soda method. Just keep baking, checking back every 5 minutes or so until a toothpick to the center comes out clean. Let cool completely before moving to a wire rack.
***
Meanwhile, make your frosting. Just mix the pudding mix in with the whipped topping for a few minutes. (You can stop here, if you want the low fat option!...I added 1/2 stick of melted butter, softened cream cheese and some powdered sugar.) Dye if you’re into that.
***
Frost and Eat.